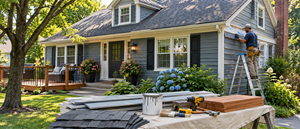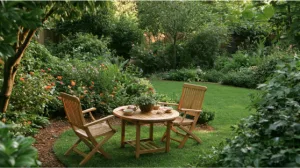
The best do it yourself backyard ideas start cheap and reversible: haul out the clutter, recut the bed edges, top up mulch, group a few potted plants, hang string lights, and build one small gravel sitting area. Permanent projects (poured patios, new fences, structures) come later, after you’ve checked drainage, buried utilities, property lines, and what the space might need to hold in five years. This is written for someone with a plain, muddy, or half-finished backyard, ordinary tools, and a limited budget. What follows is an order of work rather than a photo gallery, built around one idea: reversible first, permanent later.
Which DIY Backyard Ideas Should You Tackle First?
Homeowners pour real money into outdoor space (the global landscaping products market is valued around USD 88.64 billion), and a lot of it gets spent twice. Sorting backyard projects into three buckets prevents that.
- Reversible: movable or cheap to undo. Containers, rugs, freestanding screens, stepping stones, outdoor furniture, mulch.
- Permanent: hardscape, structures, boundary work, and anything that changes grade or drainage near the house. Usually expensive, often permitted.
- Rework cost: what you lose when a patio has to be jackhammered, a tree removed, or a fence moved because the layout changed.
Start in the first bucket. It’s where the visual payoff per dollar is highest and the risk is close to zero. Break the yard into activity zones (dining, play, growing, storage) rather than one big project that tries to redo the entire backyard at once. A full redesign in a single season is a huge undertaking for most households, and spring is when the itch to tackle the yard usually hits, which makes it a good season to plan and a bad season to rush concrete.
How Do You Do a 30-Minute Backyard Audit Before Buying Anything?
Sketch the back yard on graph paper before you spend a dollar. University of Minnesota Extension recommends a scaled site plan showing property boundaries, drainage patterns, utilities, slopes, vegetation, and any areas earmarked for future construction, because planning those first prevents costly corrections later. Walk the space with a tape measure and record:
- Dimensions and roughly where the property lines run
- Full sun, part shade, and deep shade through the day
- Where water sits or runs after rain, especially against the house
- Trees, surface roots, irrigation heads, meters, and utility routes
- The back door, gates, paths, and how a wheelbarrow or mini excavator would get in
- Views you want to screen and views worth keeping
- Your top two actual uses for the space
Then draw loose circles (a bubble diagram) over the sketch to test where each zone could go. Circles are free to move. Concrete isn’t.
Why Should You Call 811 Before Any Digging?
Call 811 or submit an online locate request a few business days before you tackle digging projects of any kind: fence posts, trees, shrubs, drainage trenches, a mailbox, patio excavation. The service is free, and some lines sit only inches below the surface. This matters more than it sounds. In the Common Ground Alliance’s 2024 DIRT data, failure to submit a locate request accounted for 24.54% of known utility-damage root causes, and fencing and landscaping made up 28% of non-utility work tied to not notifying 811. One phone call separates a weekend project from a severed gas line.
Which Almost-Free DIY Projects Make the Biggest Difference?
The under-$200 tier does more visible work than most people expect, and none of these projects can go wrong:
- Clear it out. Dead containers, broken furniture, the hose reel nobody uses. Instant.
- Wash hard surfaces. Patio, siding, fence, outdoor furniture. A power washer on a low setting handles most of it, and a gray patio is usually just a dirty patio.
- Recut bed edges. A clean spade line between lawn and bed reads as “maintained” from fifty feet away and slows weeds from creeping into the mulch.
- Group what you own. Pull chairs into a conversation group instead of lining them along the wall, and cluster three or five potted plants near the back door instead of scattering singles.
- Refinish instead of replace. Repainting a small deck runs about three hours and under $200 in materials.
- Top up mulch. University of Minnesota Extension suggests a fresh layer 2 to 4 inches deep, pulled back from trunks and stems so bark can breathe.
These are the most affordable ways to change how a yard reads, and most are super simple, same-day work. Keep plant variety modest while you’re at it. Five of one shrub is easier to care for than fifteen singleton plants.
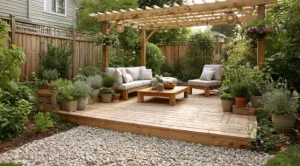
How Do You Create One Outdoor Room With Pea Gravel, Stone, or Pavers?
Complete one zone properly instead of scattering small projects across the whole yard. Mock up the footprint first: set the actual outdoor furniture out, outline it with a garden hose or chalk, and live with it over the next few weeks. You’ll find out fast whether the table is in the only patch of afternoon shade or whether the family keeps cutting through the middle.
Then work up the ladder as your confidence grows:
- Outdoor rug and movable seating. Defines a room in an afternoon, costs almost nothing to undo.
- Stepping stones down the muddy track everyone already walks. A super simple fix, and gravel or stone paths need far less upkeep than a strip of struggling grass.
- Pea gravel sitting area. Two to three days of weekend work, no concrete, no forms, and it can be raked out later.
- Pavers once the layout has finally settled.
How Should You Arrange Outdoor Furniture in the Space?
Comfort is cheap at this stage. Layered cushions and outdoor textiles soften a hard surface, a simple bench or console works as a serving station for drinks and snacks, and a stock tank makes a fun plunge pool for a tiny fraction of an in-ground installation. A small water feature like a recirculating fountain adds sound without plumbing. Leave at least a yard of walking room behind pulled-out chairs. Whatever you build, give it edging, a compacted base, and a surface that sheds water away from the house.
What Base Does a Paver or Gravel Patio Need?
Excavate to depth, compact the subgrade, then lay 4 to 6 inches of crushed gravel compacted in two or three lifts. Add a bedding sand layer, set the pavers, and lock the perimeter with edge restraint. Pea gravel is more forgiving but still wants a compacted base and a hard edge or it migrates into the lawn. Penn State Extension notes that permeable surfaces let water infiltrate instead of running straight off the property. If the patio will touch the house or change the grade near it, check permit and drainage rules before you dig.
Which Plants and Garden Beds Actually Fit Your Yard?
Match plants to the site you have rather than remaking the site for a plant you liked at the nursery. Start with a lab soil test. Oregon State University Extension recommends sampling roughly 6 to 8 inches deep for most garden plants, taking separate samples for distinct areas (vegetable bed, lawn, that wet corner), and notes basic home kits are generally weak for diagnosing nutrient problems.
Then run every candidate through this list:
- USDA hardiness zone (the 2023 map is the national standard)
- Hours of direct sun that spot gets
- Soil moisture and drainage
- Mature width and height, not nursery-pot size
- Water needs once established
- Pruning and cleanup load
- Invasiveness in your region
- Safety around kids and pets
Lean on native plants. The USDA Forest Service points out they’re adapted to local conditions and feed native pollinators and birds, and a good bed staggers bloom so flowers carry from early spring into fall instead of peaking for two weeks in May. Native perennials do that work with less replanting than annuals. Defined beds with compost-amended soil create color and texture for very little money. Renters and anyone with a small yard can get most of the same effect from potted plants and a vertical garden on a sunny wall. Be careful with trees: check the mature canopy and root spread against your foundation, overhead lines, and anything you might build later.
Can You Build a Raised Garden Bed in a Weekend?
Easily. A simple rectangular bed is roughly a three-hour build for under $300 in lumber, screws, and soil. Level the site, lay cardboard or landscape fabric underneath to smother what’s growing there, fill with a bulk soil blend, and work in 2 to 3 inches of compost. Keep it narrow enough that you can reach the center from both sides. Because it can be unbolted and moved, it’s one of the safest DIY projects to tackle early, even if your layout changes.
How Do You Cut Water Use and Maintenance in Backyard Landscaping?
EPA WaterSense estimates roughly 30% of household water use is outdoors, close to 8 billion gallons a day nationally, and as much as half of that can be wasted through overwatering, wind, evaporation, runoff, and inefficient irrigation. A few projects fix most of it:
- Hydrozone. Sort all the plants and containers by water need so the thirsty ones don’t set the schedule for everything.
- Switch beds to drip. A DIY drip or soaker line snaps together with push fittings and delivers water at the root instead of across the fence.
- Aim sprinklers off hardscape. Sidewalks don’t grow.
- Mulch before you increase run time.
- Plant in phases so you learn what survives your summers before buying fifty of them, and stay tuned to how each bed performs through its first full year.
Lawn isn’t the enemy. A small turf area for kids, pets, or games earns its keep. The rule in low-maintenance backyard landscaping is that every square foot has a purpose, and anything that doesn’t becomes a bed, a path, or artificial turf if mowing is the problem. Rain gardens can work as a DIY build where the site allows, but Penn State Extension advises keeping them at least 10 feet from a foundation and choosing a spot that drains within 24 hours.
How Can You Add Backyard Privacy Without Replacing the Fence?
Most privacy complaints are about one sight line, not the whole perimeter. Sit in the chair, look where the problem is, and block that. Reversible ideas, roughly in order of cost:
- Outdoor curtains on a simple pipe or post frame
- A freestanding lattice or modern slat screen, weighted or staked
- A trellis with fast annual vines for a single season of cover
- Tall containers or a staggered row of shrubs
- Turning the seating so the view you want is in front of you
Next tier is repair: reset a leaning post, swap out a few cupped boards, clean and re-stain what’s already standing. Those projects are often a weekend and a fraction of replacement cost. Fencing stops being a beginner job when property lines are unclear, the run is shared with a neighbor, the grade falls away, gates need real hardware, pool barrier codes apply, height limits or easements are in play, or utilities run along the line.
Service and site management matter alongside the fence material itself. Sacramento-area Fantastic Fence, as a regional example, traces its 2011 founding by Dominic Vella with Steve Kempster to frustration with contractors who didn’t return calls, arrive as scheduled, or clean up. That’s a useful prompt for vetting any bid: ask about communication, scheduling, who’s actually on the crew, licensing and insurance, written scope, and cleanup.
How Do You Cool the Space and Light the Path From the Back Door?
Shade is infrastructure. EPA’s heat island research, drawing on a review of 308 studies, found urban forest areas averaged about 3°F cooler than comparable areas without greenery, and urban trees can absorb roughly 15 to 27% of annual rainfall. At DIY scale that means a patio umbrella over the dining table, a shade sail or removable canopy on the west side of the house, a vine-covered trellis, tall container plants around the seating, and one well-chosen deciduous tree. Pick the tree for mature size and keep it away from power lines and the foundation.
How Do You Hang String Lights Without Adding a New Circuit?
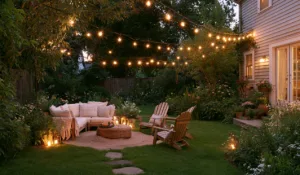
Run string lights between posts, eaves, or a tensioned cable from the back door to the seating zone, and add solar path lights so nobody trips on the stepping stones. Warm, low-glare bulbs plus a few lanterns or candles give the ambiance that pushes outdoor life well past sunset. Plug-in and solar fixtures are fair game. New circuits and hardwired fixtures belong to an electrician.
Where Should a Fire Pit, Grill, and Kids’ Play Area Go?
The U.S. Fire Administration recommends keeping outdoor fireplaces and fire pits at least 10 feet from the house and anything combustible, using a spark screen on wood fires, supervising children closely, and fully extinguishing the fire before going inside. Grills need clearance from siding, railings, eaves, and overhanging branches. Local burn bans, air-quality rules, HOA restrictions, and the manufacturer’s own clearances can all be stricter, so check before you build anything permanent.
For play equipment, CPSC guidance is blunt: never install it over concrete, asphalt, or another hard surface. For equipment up to eight feet tall, maintain at least nine inches of wood mulch, engineered wood fiber, wood chips, or qualifying rubber mulch, extended through the full use zone around the structure. Lay out circulation too. The path from the back door to the kitchen or grill shouldn’t cut through the fire ring or the swing arc.
How Do You Future-Proof the Backyard Before Making Permanent Changes?
Before you pour concrete, set a permanent fire pit, plant a large tree, or block side-yard access, ask what this property might need in five to ten years: construction and equipment access, utility trenching, a shed or workshop, a pool, a deck expansion, a ground-floor aging-in-place space, or an accessory dwelling unit. Sketch those footprints on your site plan now, and create one clear corridor wide enough for a gate, a wheelbarrow, and ideally a compact machine. That single habit keeps today’s outdoor projects from blocking tomorrow’s.
As a California example: the state’s March 2026 ADU handbook from HCD says local agencies generally may require no more than four-foot side and rear setbacks for an attached or detached ADU, though other objective standards and local conditions still apply. Sacramento offers permit-ready ADU plans, and every property still gets site-specific review. A habitable dwelling is not a DIY backyard project. A Sacramento design-build firm such as Golden State ADU illustrates the range of architectural, engineering, permitting, and construction questions a feasibility review has to work through before any of it reaches the yard.
When Should You Stop DIY and Hire a Pro?
Run your outdoor projects through seven questions:
- Does it cross or define a property boundary?
- Does it change drainage or push water toward a neighbor?
- Is it structural or load-bearing?
- Does it involve gas or hardwired electricity?
- Could failure injure someone?
- Does it need a permit or inspection?
- Would fixing a mistake cost more than hiring it out?
One yes means get a bid, or at minimum a code check with your building department. Typical professional territory: full fence installs, retaining walls and regrading, attached decks, permanent pergolas and covered patios, large tree removal, pool barriers, drainage affecting adjacent property, and anything habitable.
California sidebar: CSLB states that contracting work generally requires a license when a permit is required, workers are used, or labor and materials total $1,000 or more. It also warns that an owner-builder personally takes on responsibility for permits, inspections, workers, subcontractors, and the integrity of the finished project.
DIY Backyard Projects Compared by Budget, Time, and Permanence
Costs swing by region and material, so treat these as planning ranges rather than quotes.
| Project | Budget tier | Time | Skill | Maintenance | Permanent? | Permit / safety flag |
| Declutter & clean | Free | Half day | None | Seasonal | No | None |
| Mulch refresh (2-4 in.) | $ | Half day | Beginner | Annual | No | Keep off trunks |
| Bed edging | $ | Half day | Beginner | Twice a year | No | None |
| Container garden | $ | Hours | Beginner | Frequent watering | No | None |
| Rug + grouped seating | –$ | Hours | None | Low | No | None |
| String lights | $ | Hours | Beginner | Low | No | Outdoor-rated, no new circuits |
| Stepping-stone path | $ | 1 day | Beginner | Low | Semi | Call 811 if digging |
| Raised garden bed | $$ (under $300) | ~3 hours | Beginner | Seasonal | Semi | None |
| Pea gravel patio | $$ | 2-3 days | Intermediate | Occasional raking | Semi | 811, drainage |
| Drip irrigation | –$ | 1 day | Beginner | Annual check | Semi | Backflow rules vary |
| Freestanding privacy screen | $$ | 1 day | Intermediate | Refinish | No | Wind loading |
| Paver patio (4-6 in. base) | $$$ | Several days | Advanced | Low | Yes | Grade, drainage, possible permit |
| Fire pit | $$ | 1-2 days | Intermediate | Cleanout | Yes if built | 10 ft clearance, burn rules |
| New fence | $$$ | Days+ | Pro-leaning | Low | Yes | Boundaries, height, 811 |
| Deck or pergola | $$$$ | Weeks | Pro | Refinish | Yes | Permit, structural |
| ADU | $$$$$ | Months | Pro only | Ongoing | Yes | Design, permits, inspections |
A Three-Weekend DIY Backyard Plan You Can Actually Finish
Weekend 1: Measure and sketch the yard, mark sun and water patterns, submit an 811 request if any digging is coming. Then declutter, wash the hard surfaces, recut bed edges, and rearrange the seating into one group.
Weekend 2: Build the outdoor room. Stepping stones or a pea gravel pad, rug, seating, a few matched containers, string lights overhead.
Weekend 3: Plant. Apply what the soil test told you, put in drought-tolerant and native plants sized for their mature spread, run a drip line, mulch, and stand up a privacy screen or trellis where the sight line needs it. Three spring weekends is enough to make the entire space usable, and the work is genuinely fun once the heavy clearing is behind you. A beautiful backyard tends to come from restraint and repetition rather than from buying one of everything.
Wait on permanent construction until permits, drainage, utilities, boundaries, and your longer-term plans for a shed, pool, deck, or ADU have been confirmed.
Frequently Asked Questions About DIY Backyard Ideas
How do you do your own landscaping?
Audit and sketch the yard, test the soil, then pick one zone to finish rather than starting everywhere. Choose plants by USDA hardiness zone and actual sun hours, mulch beds 2 to 4 inches deep, and phase the projects across a few seasons. Phased backyard landscaping lets you learn what thrives before you buy in quantity.
What program can I use to design my backyard?
Start with graph paper and a bubble diagram, then move to a free tool if you want a visual: browser-based garden planners, SketchUp Free, Planner 5D, or a home center’s deck and patio planner. A measured hand sketch with real boundary dimensions beats any software fed with guesses.
How do you design a backyard with no grass?
Replace lawn with defined zones: a pea gravel or paver patio, stepping-stone paths, planting beds of drought-tolerant and native species, potted plants for color, and a small patch of artificial turf if kids or dogs need one. Favor permeable surfaces so rainfall soaks in on site instead of running to the street.
How can I make my backyard look nicer on a budget?
Declutter, wash the hard surfaces, recut bed edges, lay fresh mulch, add a few matching containers, pull seating into a group on an outdoor rug, and hang string lights. Those are the most affordable ways to lift a tired outdoor space: most of it lands under a few hundred dollars, takes a weekend, and is completely reversible if your plans change.